
Welcome to the True Metrix Glucometer Manual, your comprehensive guide to understanding and using this essential tool for blood glucose monitoring. This manual provides detailed instructions to ensure safe and accurate use of the device.
Designed for both new and experienced users, this guide covers setup, operation, and maintenance, helping you achieve reliable results and manage your diabetes effectively. Always read this manual thoroughly before using the glucometer.
1.1 Overview of the True Metrix Glucometer
The True Metrix Glucometer is a self-monitoring blood glucose system designed for people with diabetes to measure glucose levels at home. It operates by analyzing capillary blood samples from the fingertip or forearm. The meter is lightweight, portable, and easy to use, providing accurate results. It features advanced technology to detect and correct for factors like hematocrit and temperature, ensuring precise readings. The system includes the meter, test strips, and a lancing device. Regular use helps users monitor their glucose levels effectively, supporting better diabetes management. Always use the meter and test strips within the specified environmental conditions for optimal performance.
1.2 Importance of Reading the Manual
Reading the True Metrix Glucometer manual is crucial for safe and accurate use. It provides essential safety information, operating instructions, and troubleshooting guidance. The manual ensures you understand how to properly use the device, interpret results, and maintain it. By following the guidelines, you can avoid errors, ensure precise glucose readings, and prolong the device’s lifespan. It also highlights environmental conditions for use, such as temperature and humidity ranges, and explains how to handle test strips and control solutions correctly. Familiarizing yourself with the manual helps prevent misuse and ensures reliable blood glucose monitoring.
Safety Precautions and Operating Conditions
Always use the True Metrix Glucometer in accordance with the specified conditions. Avoid aerosol sprays, strong electromagnetic radiation, and extreme temperatures or humidity to ensure accurate and safe operation.
2.1 Essential Safety Information
Adhering to safety guidelines is crucial when using the True Metrix Glucometer. Avoid using the device near aerosol sprays or strong electromagnetic radiation, as these can interfere with its operation. Ensure the meter and test strips are used within the specified temperature range of 41°F to 104°F and humidity levels of 10% to 90%. Never share your glucometer with others, as it is designed for personal use. Always check the expiration dates of test strips and control solutions before use. If the device is damaged or malfunctioning, discontinue use immediately and consult the manual for troubleshooting steps. Proper handling ensures accurate results and safe monitoring.
2.2 Environmental Considerations for Use
For optimal performance, use the True Metrix Glucometer in environments with temperatures between 41°F and 104°F (5°C to 40°C) and humidity levels between 10% and 90%. Avoid exposing the device to extreme conditions, such as direct sunlight or moisture, as this may affect accuracy. Keep the meter away from strong electromagnetic fields, which can interfere with its operation. Proper storage in a cool, dry place is essential to maintain functionality. Always ensure test strips are stored in their original vial with the cap tightly closed to preserve their quality. Adhering to these guidelines ensures reliable and consistent results.
Setting Up Your True Metrix Glucometer
- Insert the test strip into the meter to activate it automatically.
- Ensure the meter is turned off before inserting the strip.
- Prepare for first-time use by following the setup guide provided.
3.1 Preparing the Meter for First-Time Use
Before using your True Metrix Glucometer, ensure all components are included and undamaged. Insert a test strip into the test port to activate the meter automatically. Check the expiration date on the test strip vial and ensure it is within the usable range. The meter will prompt you to set the date and time, which is essential for accurate record-keeping. Operate the meter in an environment between 41-104°F (5-40°C) and 10-90% humidity to ensure optimal performance. Proper setup ensures precise and reliable blood glucose readings.
3.2 Inserting the Test Strip
To insert the test strip, first, remove it from the vial and ensure it is within the expiration date. Align the strip with the test port on the meter, ensuring the contact end faces inward. Gently insert the strip until it clicks into place. The meter will automatically turn on when the strip is correctly inserted. Avoid touching the test area to prevent contamination. Once inserted, the meter is ready for a blood sample. Always use a new strip for each test and discard used strips properly. Proper insertion ensures accurate and reliable test results.
How to Use the True Metrix Glucometer
Turn on the meter by inserting a test strip. Obtain a blood sample, then apply it to the test strip. The meter will display your glucose level.
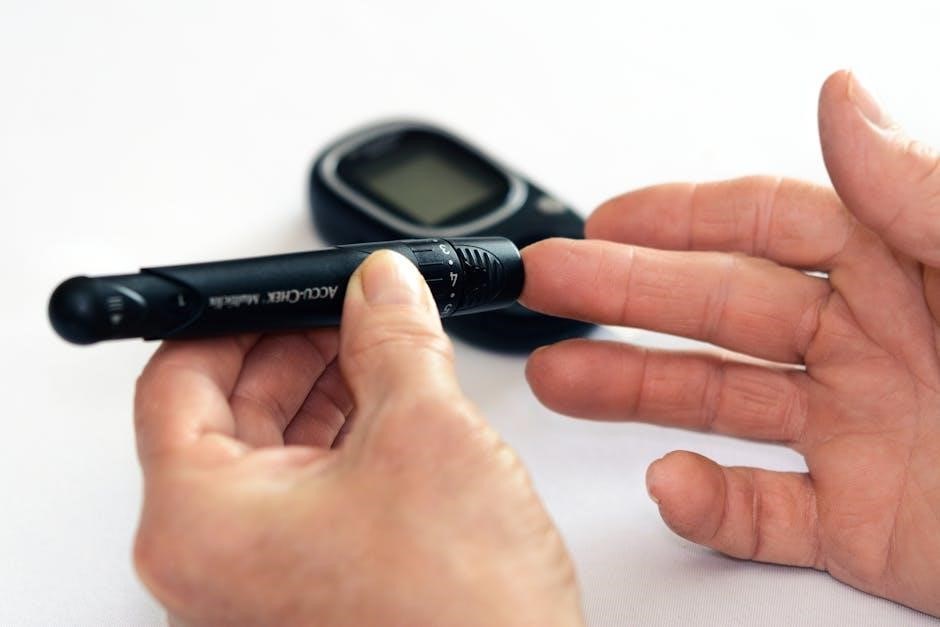
4.1 Obtaining a Blood Sample
To obtain a blood sample, wash your hands with warm water and dry them completely. Choose a fingertip or alternate site, like the forearm or palm. Avoid areas with calluses or scars for better blood flow.
Use a lancet to prick the skin gently. If using a spring-loaded device, set the depth according to your comfort. Apply gentle pressure to the pricked area until a small drop of blood forms. Avoid squeezing too hard, as this can cause inaccurate results.
Once the blood droplet is visible, stop applying pressure. If the sample is too small, wait a few seconds before reapplying pressure. Do not reuse lancets to maintain hygiene and safety.
4.2 Performing the Blood Glucose Test
Insert the test strip into the meter’s test port with the contact end facing inward. Turn the meter on automatically by inserting the strip. Gently touch the blood sample to the test strip’s tip, ensuring it fills the absorbent area completely.
Wait 4-30 seconds for the meter to analyze the sample. The screen will display your blood glucose reading. If an error occurs, such as “HI,” retest with a new strip and ensure proper technique. Store the used strip in a designated container for disposal.

Understanding Your Test Results
Understand your blood glucose readings to manage your diabetes effectively. Normal levels typically range from 70 to 140 mg/dL, while abnormal levels may indicate hyperglycemia or hypoglycemia, requiring immediate action.
5.1 Interpreting Glucose Readings
Understanding your glucose readings is crucial for managing diabetes. The True Metrix Glucometer provides accurate blood glucose measurements, displayed in mg/dL. Normal fasting levels typically range from 70 to 99 mg/dL, while postprandial levels should be below 140 mg/dL. If your reading is below 70 mg/dL, it may indicate hypoglycemia, requiring immediate treatment. Conversely, readings above 240 mg/dL signal hyperglycemia, which may necessitate medical attention. Always refer to the manual or consult your healthcare provider for personalized guidance. The meter may also display “LO” for low or “HI” for high readings, prompting retesting or further action.
5.2 Normal and Abnormal Blood Sugar Levels
Normal blood sugar levels typically range from 70 to 99 mg/dL when fasting and up to 140 mg/dL after meals. However, these are general targets, and your healthcare provider may recommend individualized ranges. Abnormal levels include readings below 70 mg/dL (hypoglycemia) or above 240 mg/dL (hyperglycemia). The True Metrix Glucometer displays “LO” for low readings and “HI” for high readings. If your glucose levels consistently fall outside the normal range, consult your healthcare provider to adjust your diabetes management plan. Understanding these levels is crucial for maintaining health and preventing complications.
Maintenance and Care of the Glucometer
Regularly clean the glucometer with a soft cloth and avoid harsh chemicals. Store it in a cool, dry place, away from direct sunlight and electromagnetic interference.
6.1 Cleaning the Meter
Regular cleaning of the True Metrix Glucometer is essential for maintaining accuracy and longevity. Use a soft, dry cloth to wipe the meter’s exterior gently. Avoid using harsh chemicals, abrasive materials, or excessive moisture, as these may damage the device. For tougher spots, a slightly dampened cloth can be used, but ensure no liquid enters the test port or other openings. Never submerge the meter in water or expose it to alcohol-based cleaners. Cleaning the meter after each use helps prevent contamination and ensures reliable blood glucose readings. Always dry the meter thoroughly before storing it to prevent moisture buildup.
6.2 Storing the Meter and Test Strips
Store the True Metrix Glucometer in a cool, dry place, away from direct sunlight and moisture. Avoid extreme temperatures (41°F to 104°F) and humidity levels above 90%. Keep the meter and test strips away from strong electromagnetic sources. Test strips should remain in their original vial with the lid tightly sealed to maintain humidity levels. Do not use strips beyond their expiration date or more than four months after opening. Proper storage ensures the accuracy and longevity of your glucometer and test strips, providing reliable blood glucose measurements when needed.

Troubleshooting Common Issues
Identify error messages, clean the meter, and ensure test strips are within expiration dates. For persistent issues, consult the manual or contact customer support for assistance.
7.1 Resolving Error Messages
If your True Metrix Glucometer displays an error message, first check the control solution and test strip expiration dates. Ensure the meter is clean and free from damage. Verify that the test strip is properly inserted and not expired. If the issue persists, refer to the troubleshooting section in the manual or contact customer support at 1-800-803-6025 for further assistance. Always follow the recommended steps to resolve errors and ensure accurate readings.
7.2 What to Do if the Meter Displays “HI”
If your True Metrix Glucometer displays “HI,” it indicates a blood glucose level exceeding the meter’s measurable range. Retest using a new strip to confirm the reading. If “HI” persists, your blood sugar may be extremely high. Wash your hands with warm water, dry thoroughly, and use a new lancet to obtain a fresh blood sample. Apply gentle pressure to the fingertip or use an alternative site like the forearm. Consult your healthcare provider immediately if levels remain high, as this may require medical attention. Always refer to the manual for detailed troubleshooting guidance.
The True Metrix Glucometer Manual provides essential guidance for safe and effective blood glucose monitoring. By following the instructions, troubleshooting tips, and maintenance advice, users can ensure accurate results and prolong the life of their device. Always refer to this manual for resolving issues like error messages or “HI” displays. Regular maintenance and proper storage of the meter and test strips are crucial for reliable performance. If questions persist, consult healthcare professionals or contact customer support. This manual empowers users to manage their diabetes confidently and effectively, ensuring optimal health outcomes through precise glucose monitoring.