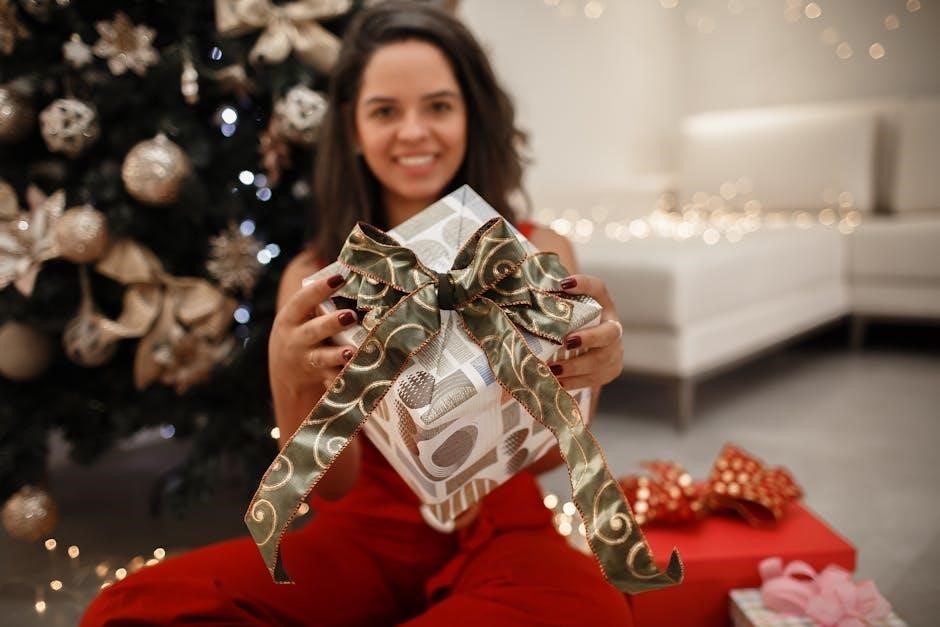
Welcome to our step-by-step guide on creating stunning cheer bows! Learn the basics of making professional-looking bows for competitions‚ spirit events‚ or personal style with ease and precision.
Importance of Cheer Bows in Cheerleading
Cheer bows are a vital part of a cheerleader’s uniform‚ symbolizing team spirit and unity. They add a professional touch to outfits and help teams stand out during competitions. Cheer bows also serve as a way to showcase creativity and personal style while matching team colors or themes. A well-made bow can boost morale‚ create a cohesive look‚ and even inspire fans. Additionally‚ they are often used as gifts or mementos for teammates‚ coaches‚ or special events. The bow’s design and details reflect the team’s identity‚ making it a meaningful accessory for every cheerleader. Its presence completes the overall aesthetic of the cheerleading attire.
Brief Overview of the Tutorial
This tutorial provides a clear‚ step-by-step guide to crafting a professional cheer bow in just 15 minutes. Perfect for beginners‚ it covers essential steps‚ from cutting ribbon to securing the bow. Key materials include 28-inch grosgrain ribbon‚ a rhinestone centerpiece‚ and a zip tie for a polished finish. The process includes folding‚ looping‚ and shaping the ribbon‚ with tips for customization. A template is recommended to ensure accuracy. By following the instructions‚ you’ll create a stunning‚ competition-ready bow that matches your team’s colors or personal style. This guide makes it easy to produce high-quality results with minimal effort and time.

Materials and Supplies Needed
Gather essential supplies like 28-inch grosgrain ribbon‚ a rhinestone or centerpiece‚ a zip tie‚ and a cheer bow template for precise folding and shaping. These ensure a professional finish.
Grosgrain Ribbon (28 Inches Long‚ 3 Inches Wide)
The grosgrain ribbon is a essential material for crafting a professional cheer bow. It is recommended to use a ribbon that is 28 inches long and 3 inches wide. This specific size ensures the bow has full‚ voluminous loops and balanced tails. Grosgrain ribbon is preferred due to its textured‚ ribbed surface‚ which holds its shape well and prevents excessive fraying. When cutting‚ ensure accuracy to maintain consistency in the bow’s appearance. Adjusting the length allows for customization‚ such as longer tails or larger loops‚ while staying within the 30-32 inch range for optimal results. High-quality grosgrain ribbon is durable and vibrant‚ making it ideal for competition-level cheer bows.
Rhinestone or Centerpiece for the Bow
A rhinestone or centerpiece adds a touch of sparkle and sophistication to your cheer bow‚ making it stand out. This decorative element is placed in the center of the bow and serves as a focal point. Rhinestones are popular for their ability to catch light‚ creating a dazzling effect. You can choose from various sizes‚ shapes‚ and colors to match your team’s theme or personal style. For a more personalized look‚ consider adding a custom graphic or text. The centerpiece is secured using a strong adhesive or hot glue‚ ensuring it stays in place. It not only enhances the bow’s appearance but also helps hold the loops together‚ giving the bow its signature shape. This detail elevates your cheer bow from simple to spectacular.
Zip Tie for Securing the Bow
A zip tie is a crucial tool for securing the bow’s structure‚ ensuring it holds its shape and remains intact. By looping the ribbon ends around the zip tie‚ you create a sturdy base that keeps the bow’s loops in place. This step is essential before adding any embellishments‚ as it provides a solid foundation for the bow’s design. The zip tie is easy to adjust and allows for precise tightening‚ making it ideal for achieving a professional finish. Once the bow is formed‚ the zip tie is hidden beneath the centerpiece‚ leaving a polished and seamless appearance. This simple yet effective method ensures your cheer bow stays secure and looks great for any event.
Cheer Bow Template for Accuracy
A cheer bow template is a valuable tool for achieving precision and consistency in your bow-making process. It provides a visual guide‚ marking the exact spots to fold the ribbon and place embellishments‚ ensuring a professional finish. This template is especially helpful for beginners‚ as it eliminates guesswork and helps create uniform loops and proportions. Many templates are designed with specific measurements and patterns‚ catering to both simple and intricate bow designs. By using a template‚ you can save time and avoid mistakes‚ resulting in a perfectly shaped bow every time. Templates are widely available online‚ with options for customization to match your desired style or team colors.
Step-by-Step Guide to Making a Cheer Bow
This guide offers a clear‚ seven-step process to craft a perfect cheer bow‚ ensuring ease and professional results. Learn to customize and match your team colors effortlessly.
Step 1: Cutting the Ribbon to the Correct Length
Begin by cutting your grosgrain ribbon to the standard length of 30 inches. This allows for creating the perfect bow loops while leaving enough ribbon for the tails. For larger bows or longer tails‚ you can adjust the length‚ but avoid exceeding 32 inches to maintain a balanced look. Use sharp scissors to ensure clean cuts and prevent fraying. Accuracy is key‚ as the ribbon length directly impacts the bow’s proportions. If unsure‚ start with 30 inches‚ as it works well for most cheer bow designs. Double-check the measurement before cutting to avoid waste and ensure consistency in your project.
Step 2: Folding the Ribbon to Create Loops
Once the ribbon is cut to the desired length‚ fold it in half to locate the midpoint. This creates the foundation for the bow’s loops. Bring the ends of the ribbon together at the center point‚ forming two loops on each side. Ensure the loops are evenly sized and aligned for a professional appearance. To achieve a standard cheer bow‚ make two loops on each side‚ with the outer loop slightly larger than the inner one. The loops should measure approximately 6 inches for the outer loop and 5 inches for the inner loop. Hold the loops in place temporarily without tying them‚ ensuring they remain consistent in size and shape before securing.
Step 3: Crossing the Ribbon Ends for the Bow Shape
After folding the ribbon to create loops‚ cross one end of the ribbon over the other to form the bow’s signature “X” shape. This step is crucial for achieving the classic cheer bow appearance. Hold the crossed ends firmly to maintain the structure as you begin shaping the bow. The loops should begin to take form‚ with the crossed ends creating tension that defines the bow’s edges. Ensure the loops are balanced and symmetrical by adjusting the ribbon as needed. Properly crossing the ends will result in a tight‚ professional-looking bow that holds its shape securely. This step sets the foundation for securing the bow in the next phase.
Step 4: Securing the Bow with a Zip Tie
Once the loops are formed and the ribbon ends are crossed‚ wrap a zip tie tightly around the center of the bow to secure it in place. Ensure the loops remain aligned and the bow maintains its shape. Tighten the zip tie firmly to hold the structure‚ then trim the excess zip tie with scissors for a neat finish. This step is essential for keeping the bow intact and preventing it from unraveling. The zip tie acts as a durable and reliable fastener‚ ensuring the bow stays secure during wear. Properly securing the bow with a zip tie will result in a sturdy‚ professional-looking finish that withstands active use.
Step 5: Adding the Centerpiece or Rhinestone
After securing the bow with a zip tie‚ attach the centerpiece or rhinestone to the center of the bow. This step adds a polished and personalized touch. Use hot glue to ensure the centerpiece stays firmly in place. Apply a small amount of glue to the back of the rhinestone or centerpiece and press it into the center of the bow. Hold it for a few seconds to ensure it adheres properly. If using a bow template‚ align the centerpiece with the marked center point for accuracy. This step enhances the bow’s appearance and gives it a professional finish. Properly placed embellishments make the bow stand out and add sparkle to the design.
Step 6: Trimming the Excess Ribbon
Once the bow is secured with a zip tie and the centerpiece is in place‚ trim the excess ribbon to achieve a clean finish. Use sharp scissors to cut the ribbon ends at a slight angle for a professional look; Ensure the tails are even and the desired length is maintained. Typically‚ tails are trimmed to about 4-6 inches long‚ but this can be adjusted based on preference. For a polished appearance‚ align the ribbon ends carefully before cutting. If using a template‚ refer to the guidelines for precise trimming. Proper trimming ensures the bow looks neat and well-crafted‚ completing its transformation into a stunning cheer accessory.

Step 7: Attaching the Bow to a Ponytail Holder
After completing the bow‚ attach it to a ponytail holder for a secure and stylish finish. Wrap the zip tie around the base of the bow and the ponytail holder‚ tightening gently. Tuck the zip tie ends under the bow for a clean appearance. For added stability‚ apply a small dot of hot glue to the zip tie; Ensure the bow is centered and the holder is snug. Test the fit by gently tugging the bow to confirm it’s securely attached. This step ensures the bow stays in place during performances or events‚ providing a professional and durable finish to your DIY cheer bow.
Customization Ideas for Cheer Bows
Explore endless customization options for your cheer bows with unique patterns‚ seasonal themes‚ and personalized designs that reflect individual or team spirit perfectly.
Adding Glitter or Sparkly Details
Add a touch of sparkle to your cheer bow with glitter or rhinestone embellishments. Use glitter ribbon for a vibrant look or apply rhinestones for a more polished appearance. For added flair‚ mix glitter fabric paint with clear glue and brush it onto specific areas of the bow. To ensure durability‚ seal glitter details with a light coat of hairspray. For a more elaborate design‚ layer glitter ribbon under sheer fabric or incorporate sequins for extra dimension. These sparkly accents make your cheer bow stand out‚ perfect for competitions or special events. Experiment with different materials and techniques to create a unique‚ eye-catching design that reflects your team spirit or personal style.
Using Team Colors for Personalization
Customizing your cheer bow with team colors is a great way to show spirit and unity. Start by selecting ribbon and accents in your team’s specific colors‚ ensuring a cohesive look. Layer ribbons in contrasting shades to create depth‚ or use a single color for a bold statement. For a polished finish‚ match the bow’s centerpiece or rhinestone to your team’s primary hue. Experiment with patterns like stripes or polka dots in team colors for added visual interest. Balancing colors is key—use a color wheel to ensure harmony. This personalization makes your cheer bow unique and representative of your team’s identity‚ perfect for competitions‚ games‚ or spirit weeks.
Embellishments and Unique Designs
Elevate your cheer bow with creative embellishments and unique designs. Add rhinestones‚ glitter‚ or small charms for extra sparkle. Experiment with layering ribbons in contrasting colors or patterns. Create a personalized look by adding your name‚ team logo‚ or mascots using fabric paint or iron-on transfers. For a 3D effect‚ stack smaller bows or add dimensional elements like flowers or beads. Incorporate themed designs‚ such as seasonal motifs or holiday-inspired graphics. Try folding techniques like accordion pleats or spiral twists for a distinctive appearance. Don’t forget to balance embellishments with simplicity to avoid overwhelming the bow. These unique touches will make your cheer bow stand out and reflect your personality or team spirit.
With these easy steps‚ you can master creating beautiful cheer bows. Customize designs‚ add flair‚ and enjoy the satisfaction of crafting something truly special and personalized.
Final Tips for Making the Perfect Cheer Bow
To ensure your cheer bow turns out perfectly‚ always use high-quality grosgrain ribbon for durability and a polished look. Keep your folds precise and tighten the zip tie securely to maintain the bow’s shape. Using a template can help achieve consistency‚ especially for beginners. Don’t forget to trim excess ribbon neatly for a clean finish. Experiment with customization‚ such as adding glitter or team colors‚ to make your bow stand out. Practice makes perfect—don’t be discouraged if it takes a few tries to get the desired result. With these tips‚ you’ll create professional-looking cheer bows that impress at any event or competition.