
Article Plan: Motorcraft Lacquer Touch-Up Paint Instructions

Motorcraft, a Ford subsidiary, provides specialized automotive parts, including touch-up paints. These paints, often lacquer-based, require specific application techniques for optimal results and long-lasting vehicle appearance.
Motorcraft touch-up paint represents a crucial solution for maintaining the aesthetic integrity of your Ford or Lincoln vehicle. As a dedicated parts and accessories brand under the Ford Motor Company umbrella, Motorcraft delivers products engineered to meet the specific needs of these vehicles, ensuring a seamless color match and durable repair. Unlike universal touch-up solutions, Motorcraft paints are formulated to precisely replicate the original factory finish, preserving your vehicle’s value and appearance.
These paints are frequently lacquer-based, a characteristic that demands careful consideration during application. Lacquer paints are known for their quick drying times and high gloss finish, but they also require meticulous surface preparation and application techniques to achieve professional-looking results. Motorcraft offers a range of touch-up paint options, including brush-in bottles and paint pens, catering to varying levels of repair complexity and user preference. Understanding the nuances of Motorcraft touch-up paint, from identifying the correct paint code to mastering the application process, is key to restoring minor paint imperfections effectively.
Understanding Lacquer Paint
Lacquer paint, commonly found in Motorcraft touch-up solutions, is a fast-drying, solvent-based coating renowned for its brilliant gloss and relatively simple application. Historically favored in automotive refinishing, lacquer creates a hard, durable finish when properly applied. However, its characteristics necessitate specific handling procedures. Unlike modern basecoat/clearcoat systems, lacquer doesn’t require a separate clear coat, simplifying the repair process.
The rapid evaporation of solvents in lacquer means it dries quickly, which can be both an advantage and a challenge. Quick drying minimizes wait times between coats, but also demands swift and even application to avoid visible brush strokes or uneven coverage. Lacquer is also less flexible than some modern paints, making it potentially prone to cracking on surfaces subject to significant flexing. Proper surface preparation, including cleaning, sanding, and priming (if needed), is crucial for adhesion. Furthermore, lacquer is susceptible to damage from harsh chemicals and requires protective measures like waxing to maintain its luster and durability.
Identifying Your Vehicle’s Paint Code
Accurately identifying your vehicle’s paint code is paramount when ordering Motorcraft lacquer touch-up paint. This alphanumeric code ensures a precise color match, vital for seamless repairs. The paint code isn’t simply the color name (like “Race Red”), but a unique identifier specifying the exact pigment formulation used at the factory.
Ford typically places the paint code sticker in several locations within the vehicle. Common spots include the driver’s side door jamb, inside the glove compartment, on the radiator support, or even within the engine compartment. The sticker is often small and may be labeled with terms like “Color Code,” “Paint Code,” or “Exterior Color.” It’s crucial to locate the original factory sticker, as any repainting will render the code inaccurate for matching the original finish. Once located, carefully transcribe the code, paying close attention to letters and numbers to avoid errors. A misread code will result in an incorrect paint match, defeating the purpose of a touch-up repair.
Locating the Paint Code Sticker
Finding your vehicle’s paint code sticker requires a systematic search. Start by checking the driver’s side door jamb – this is the most frequent location for Ford vehicles. Open the door and examine the sticker affixed to the door’s edge or the body frame. If not there, inspect the glove compartment; some models have the sticker inside, often on the underside of the lid or the compartment’s wall.
Next, investigate the engine compartment, specifically the radiator support – the metal panel directly behind the front grille. Look for a sticker attached to this area. Finally, check under the hood on the cowl panel. The sticker is usually a small, rectangular label. It may be silver, white, or black, and often includes other vehicle information alongside the paint code. Be patient and thorough; the sticker can sometimes be obscured or partially hidden. Once found, protect the code from damage during transcription.
Decoding the Paint Code Format
Ford paint codes, including those used for Motorcraft touch-up paints, typically follow a specific alphanumeric format. While variations exist across model years, a common structure involves a combination of letters and numbers. The initial letter(s) often indicate the paint type or color family – for example, ‘M’ might signify metallic, and ‘B’ could denote black. Following letters represent the specific color shade within that family.
The subsequent numbers usually denote the color variation or intensity. Some codes include a final character indicating the clear coat formulation. Understanding this structure is crucial for accurately identifying your vehicle’s original paint color. Online resources and Ford paint code databases can assist in deciphering complex codes. Always double-check the decoded color against your vehicle’s existing paint to confirm accuracy before ordering touch-up paint. Incorrect decoding leads to a mismatched repair, diminishing the quality of the finish.
Motorcraft Touch-Up Paint Options
Motorcraft offers several touch-up paint options designed for precise color matching and durable repairs. These typically include paint bottles with integrated brush applicators, convenient for small scratches and chips. Alternatively, paint pens provide greater control for fine lines and detailed work. Both options utilize lacquer-based formulas, known for their quick drying time and high gloss finish.
Motorcraft also provides separate clear coats, essential for replicating the original factory finish, particularly on metallic or pearlized colors. These clear coats add protection against UV damage and enhance the paint’s depth and shine. Some kits include a prep solution for cleaning and degreasing the damaged area, alongside a rubbing compound for blending the repaired spot seamlessly with the surrounding paint. Choosing the right Motorcraft option depends on the extent of the damage and your preferred application method.
Available Colors and Finishes
Motorcraft touch-up paints boast an extensive color palette, meticulously formulated to match the original factory shades of Ford and Lincoln vehicles. The range encompasses both standard single-stage colors and complex multi-coat finishes, including metallic, pearl, and tri-coat options. Finding the exact match is crucial, and Motorcraft relies on precise paint codes (discussed elsewhere) to ensure accuracy.
Finishes available generally include gloss, semi-gloss, and matte, mirroring the original vehicle’s paint type. Lacquer paints, favored by Motorcraft, deliver a high-gloss sheen when properly applied and clear-coated. However, achieving a perfect blend requires careful attention to application technique and layering. Motorcraft’s color database is continually updated to accommodate newer vehicle models and color variations, ensuring compatibility and a seamless repair. Availability may vary depending on the specific color and retailer.
Purchasing Motorcraft Touch-Up Paint
Motorcraft touch-up paint can be conveniently acquired through two primary channels: authorized Ford dealerships and various online retailers. Dealerships offer the advantage of expert assistance in identifying the correct paint code for your vehicle, ensuring a precise color match. They typically stock a comprehensive range of colors, though availability can fluctuate. Expect potentially higher prices at dealerships compared to online sources.
Online retailers, such as Amazon, eBay, and specialized automotive paint suppliers, provide a wider selection and often competitive pricing. However, verifying the paint code accuracy becomes your responsibility. Thoroughly cross-reference the code with your vehicle’s documentation before purchasing. Ensure the retailer specializes in automotive paints and offers genuine Motorcraft products to avoid counterfeit or mismatched paints. Consider shipping costs and return policies when making your decision. Always prioritize authenticity for optimal results.

Online Retailers vs. Dealerships
When sourcing Motorcraft touch-up paint, the choice between online retailers and Ford dealerships presents distinct advantages and disadvantages. Dealerships excel in personalized service; staff can accurately pinpoint your vehicle’s paint code, minimizing errors. This expertise is invaluable, especially for complex or older color formulations. However, dealership pricing often reflects this convenience, typically being higher than online alternatives.
Online retailers offer broader selections and competitive pricing, appealing to budget-conscious consumers. Yet, the onus of verifying the correct paint code falls squarely on the buyer. Incorrect codes lead to mismatched repairs, negating the benefits of cost savings. Reputable online automotive paint specialists often provide code lookup tools and detailed product descriptions. Prioritize retailers with robust return policies, safeguarding against errors. Consider shipping costs and delivery times when comparing options. Authenticity is paramount; ensure the product is genuine Motorcraft to guarantee quality and compatibility.
Preparing the Surface for Touch-Up
Proper surface preparation is paramount for a durable and aesthetically pleasing Motorcraft lacquer touch-up. Begin by thoroughly cleaning the damaged area with soap and water, removing dirt, grease, and any contaminants. A wax and grease remover is highly recommended for optimal adhesion. Next, address any rust; use a wire brush or rust converter to eliminate corrosion, ensuring a stable base. Remove any loose paint flakes with a scraper or fine-grit sandpaper.
Sanding the area around the damage is crucial. Start with 400-grit sandpaper to feather the edges of the existing paint, creating a smooth transition. Progress to 600-grit for a refined surface. Wipe away sanding dust with a tack cloth. If the damage is deep, exposing bare metal, applying a thin coat of automotive primer is essential to prevent future rust and promote paint adhesion. Allow the primer to dry completely before proceeding with the Motorcraft lacquer application. A well-prepared surface guarantees a professional-looking repair.
Cleaning the Damaged Area
Before applying Motorcraft lacquer touch-up paint, meticulous cleaning of the damaged area is non-negotiable. Begin with a simple wash using warm water and a mild automotive soap. This removes loose dirt and debris. However, this initial cleaning is rarely sufficient. Automotive surfaces often harbor stubborn contaminants like wax, grease, and silicone – residues that prevent proper paint adhesion.
Therefore, a dedicated wax and grease remover is essential. Apply it liberally to a clean microfiber cloth and thoroughly wipe the affected area; Multiple passes may be necessary. Inspect the surface closely; any remaining residue will compromise the repair. For particularly stubborn grime, consider using a detailing clay bar, followed by another application of wax and grease remover. Ensure the area is completely dry before proceeding. A clean surface is the foundation for a successful and long-lasting Motorcraft touch-up.
Removing Rust and Loose Paint
Addressing rust and loose paint is crucial before applying Motorcraft lacquer touch-up. Ignoring these issues guarantees premature failure of the repair. Begin by carefully removing any flaking or peeling paint using a paint scraper or a specialized plastic scraper to avoid damaging the surrounding good paint. Gentle pressure is key; avoid gouging the metal.
Once the loose paint is gone, tackle any rust. For minor surface rust, a rust converter is an excellent option. It chemically transforms the rust into a stable, paintable surface. Follow the product’s instructions precisely. For more substantial rust, mechanical removal is necessary. A wire brush, sandpaper (starting with a coarser grit like 80-grit and progressing to finer grits), or even a power tool with a wire wheel can be used.
After rust removal, thoroughly clean the area with wax and grease remover to eliminate any residue from the process. Ensure all traces of rust and loose paint are gone before proceeding with sanding and priming, preparing a solid base for the Motorcraft touch-up paint.
Sanding the Area Smoothly
Proper sanding is paramount for a seamless Motorcraft lacquer touch-up. After removing rust and loose paint, the repaired area likely has uneven edges. Begin with 320-grit sandpaper to feather the edges of the remaining paint, blending them smoothly into the surrounding finish. Use a sanding block to maintain a flat, even surface and prevent creating dips or waves.
Apply light, even pressure, sanding in a circular motion, then switching to straight lines parallel to the damage. This helps eliminate swirl marks. Gradually increase the grit to 400-grit, then finally to 600-grit, refining the surface with each step. The goal isn’t to remove all the original paint, but to create a gradual transition.
Frequently wipe away sanding dust with a tack cloth to assess your progress and ensure a clean surface. A smooth, even surface provides the ideal foundation for primer (if needed) and the Motorcraft lacquer touch-up paint, maximizing adhesion and resulting in a professional-looking repair. Don’t underestimate this step!
Applying Primer (If Necessary)
Determining if primer is needed before applying Motorcraft lacquer touch-up paint depends on the extent of the damage. If you’ve sanded down to bare metal, or if the original paint was significantly compromised, primer is crucial; Primer provides a bonding layer, promoting adhesion of the lacquer to the metal and preventing rust.
Use a Motorcraft-approved or compatible automotive primer specifically designed for lacquer paints. Apply thin, even coats using a fine-bristled brush or a spray can, following the manufacturer’s instructions. Avoid applying primer too thickly, as this can lead to runs or a textured finish.
Allow the primer to dry completely, typically for 30-60 minutes, or as specified on the product label. Lightly sand the primed surface with 600-grit sandpaper to create a smooth, even base for the lacquer. Wipe away any sanding dust with a tack cloth before proceeding. Skipping primer on bare metal will likely result in poor adhesion and premature paint failure.
Shaking the Paint Bottle
Properly preparing your Motorcraft lacquer touch-up paint is paramount for a consistent color match and smooth application. Lacquer paints contain pigments and resins that settle over time, so thorough mixing is essential. Before opening the bottle, allow it to reach room temperature for optimal viscosity.
Securely close the lid and shake the bottle vigorously for at least three to five minutes. This isn’t a gentle swirl; it requires substantial force to re-disperse the settled pigments. You should hear the internal mixing ball rattling freely within the bottle. Insufficient shaking will result in uneven color distribution and a potentially poor finish.
Periodically check the paint’s consistency as you shake. It should feel smooth and uniform. If using a paint pen, follow the manufacturer’s instructions, which may involve clicking the pen tip several times to activate the internal mixing mechanism. Properly shaken paint ensures a consistent color and prevents clogging of the brush or pen tip during application.
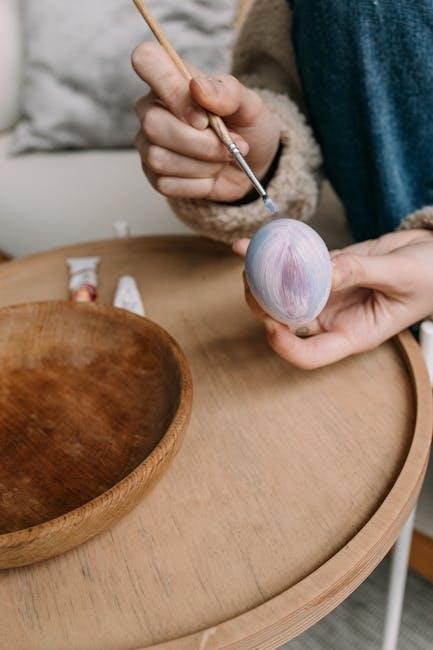
Application Techniques: Brush vs. Pen
Motorcraft lacquer touch-up paint is typically available with two application methods: a small brush or a paint pen. The choice depends on the size and nature of the damage. Brushes offer greater control for larger areas or irregular shapes, allowing for careful layering and blending. However, achieving a smooth finish with a brush requires practice and a steady hand.
Paint pens are ideal for small chips and scratches. Their precision tip delivers paint directly to the damaged area, minimizing the risk of over-application. Pens are generally easier to use for beginners, providing a cleaner and more controlled application. However, they may require more applications to build up sufficient paint coverage.

Regardless of the method, avoid applying excessive pressure. Let the paint flow naturally. For brushes, use light, even strokes. With pens, gently dab the paint into the chip. Remember, multiple thin coats are always preferable to one thick coat, ensuring proper adhesion and a durable repair.
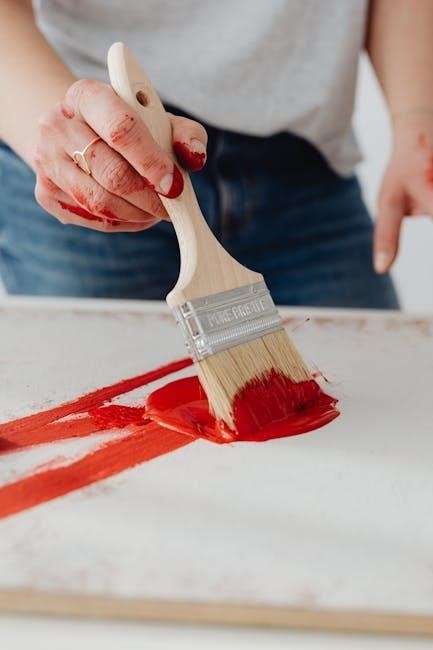
Applying Thin Coats of Paint
When utilizing Motorcraft lacquer touch-up paint, the cornerstone of a professional-looking repair lies in applying exceptionally thin coats. Resist the urge to cover the damage in a single, thick application. This often leads to runs, sags, and poor adhesion, ultimately diminishing the repair’s quality and longevity.
Instead, begin with a very light dusting of paint, barely covering the affected area. Allow this initial coat to thoroughly dry – typically 10-20 minutes, depending on ambient temperature and humidity. Subsequent coats should be equally thin, building up the paint layer gradually. Each layer contributes to depth of color and smooths out imperfections.
Observe the paint’s consistency as you apply each coat. It should flow smoothly without pooling or dripping. If you notice any buildup, immediately stop and allow it to dry before proceeding. Patience is key; several thin coats will yield a far superior result compared to a rushed, heavy-handed approach. This method ensures proper bonding and a durable finish.
Allowing for Drying Time Between Coats
Proper drying time between coats is absolutely critical when working with Motorcraft lacquer touch-up paint. Lacquer is known for its rapid drying properties, but rushing the process can compromise the final result. Insufficient drying leads to paint runs, bubbling, and poor adhesion – essentially negating the benefits of using quality paint.
As a general guideline, allow at least 10-20 minutes of drying time between each thin coat applied. However, this timeframe can fluctuate based on environmental factors. Higher humidity and cooler temperatures will naturally extend drying times. Always check the paint bottle for specific recommendations from Motorcraft.
A simple touch test can help determine if the paint is sufficiently dry. Gently touch the painted area with a clean finger; if it feels tacky, it needs more time. Avoid applying the next coat until the surface is completely dry to the touch. This patience ensures each layer properly bonds, creating a durable and aesthetically pleasing repair.
Building Up the Paint Layer
Achieving a seamless repair with Motorcraft lacquer touch-up paint rarely happens with a single coat. Instead, the key is to build up the paint layer gradually, applying multiple thin coats rather than one thick application. This method minimizes the risk of runs, drips, and an uneven finish.
Each subsequent coat should be lighter than the previous one, focusing on filling in any remaining imperfections and blending the repaired area with the surrounding paint. Avoid applying too much paint at once; it’s far easier to add more layers than to remove excess lacquer. Remember, lacquer dries quickly, so work efficiently but deliberately.
Inspect the area after each coat to assess progress. Continue applying thin layers until the repaired spot is level with the existing paint surface. This may require three to five coats, or even more depending on the depth of the damage. Patience and a light touch are paramount for a professional-looking result using Motorcraft products.
Wet Sanding (For a Smoother Finish)
For a truly flawless repair using Motorcraft lacquer touch-up paint, wet sanding is a crucial step. This process involves using very fine-grit sandpaper (typically 2000-grit or higher) with a lubricant, usually water, to gently level the repaired area with the surrounding paint.
Before starting, ensure the paint is completely dry and hardened. Wrap the sandpaper around a sanding block for even pressure. Lightly sand the area in a circular motion, keeping the surface consistently wet. The water acts as a coolant and prevents the sandpaper from clogging.
Inspect frequently to avoid sanding through the new paint. The goal isn’t to remove the paint entirely, but to eliminate any orange peel texture or minor imperfections. After wet sanding, thoroughly clean the area to remove any sanding residue. This prepares the surface for polishing, revealing a smooth, blended finish that closely matches the original factory paint using Motorcraft’s quality products.
Applying Clear Coat (If Applicable)
Not all Motorcraft lacquer touch-up paint repairs require a clear coat, but for metallic or tri-coat finishes, it’s essential for achieving a professional-looking, durable result. The clear coat provides added gloss, UV protection, and depth to the repaired area.
Ensure the base coat of Motorcraft lacquer is fully dry before applying the clear coat. Apply the clear coat in thin, even layers using a fine-tipped applicator, similar to the base coat application. Avoid applying too much, as this can lead to runs or sags.
Allow sufficient drying time between coats, as specified on the clear coat product label. Typically, two to three thin coats are sufficient. After the final coat is completely dry, wet sanding (as described previously) can further refine the finish. Finally, polishing and buffing will restore the original shine and blend the repair seamlessly with the surrounding paint, maximizing the benefits of Motorcraft’s system.
Polishing and Buffing the Repaired Area
After the clear coat (if applied) has fully cured – typically several days – polishing and buffing are crucial steps to blend the repaired area seamlessly with the surrounding factory finish. This process removes any minor imperfections, such as orange peel or light scratches, left from the application and sanding stages.
Begin with a polishing compound designed for automotive lacquer finishes. Apply a small amount to a polishing pad attached to a dual-action polisher. Work the compound in circular motions, applying light to moderate pressure.
Follow up with a buffing compound to enhance the gloss and clarity. Use a clean buffing pad and repeat the process. Always test in an inconspicuous area first. Motorcraft’s touch-up system, when properly executed, yields a repair that, with careful polishing and buffing, becomes virtually undetectable, restoring your vehicle’s appearance to its original condition. Remember to clean the area thoroughly after each step.
Troubleshooting Common Issues
Several issues can arise during Motorcraft lacquer touch-up paint application. A common problem is “fish-eye,” caused by surface contamination; ensure meticulous cleaning before starting. If the paint doesn’t adhere, inadequate surface preparation – insufficient sanding or lack of primer – is likely the culprit.
Color mismatch can occur if the paint code was incorrectly identified or the original paint has faded. Uneven application, resulting in visible brush strokes or a textured finish, often stems from applying too much paint at once or using improper technique. Allow sufficient drying time between coats to prevent runs and sags.
If the repaired area lacks gloss, polishing and buffing are essential. For stubborn imperfections, consider applying additional clear coat layers. Remember, patience and attention to detail are key. Addressing these issues promptly ensures a professional-looking, durable repair, maintaining your vehicle’s aesthetic value.
Long-Term Paint Protection and Maintenance

Following a Motorcraft lacquer touch-up, long-term protection requires consistent maintenance. Regularly wash your vehicle using pH-neutral car soap to remove contaminants that can degrade the paint. Avoid harsh chemicals and abrasive cleaners, as these can damage the repaired area.
Applying a quality wax or sealant every few months creates a protective barrier against UV rays, oxidation, and environmental pollutants. Consider using a ceramic coating for even greater durability and gloss retention. Inspect the touched-up area periodically for any signs of chipping or fading.
Promptly address any new damage to prevent rust formation. Touch-up paint should be reapplied as needed to maintain a seamless appearance. Parking in shaded areas minimizes UV exposure, extending the life of the paint. Consistent care ensures your repair remains virtually invisible and preserves your vehicle’s finish for years to come.