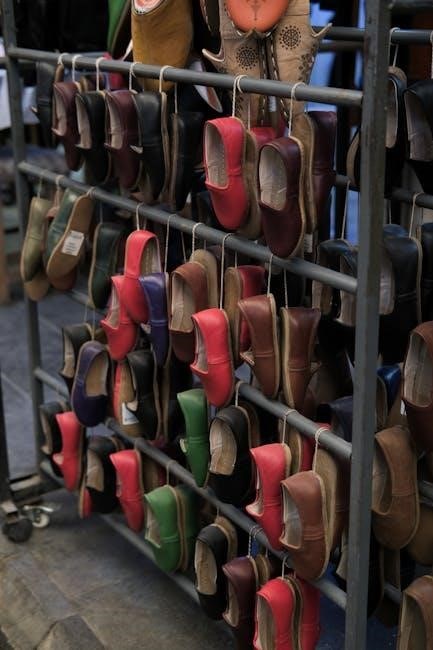
A Shoe Rack Plans PDF offers a convenient and practical guide for creating organized shoe storage solutions. It provides detailed instructions, diagrams, and material lists to help DIY enthusiasts build functional and stylish shoe racks. Perfect for beginners and experienced crafters, these plans ensure efficient use of space and budget. Downloading a Shoe Rack Plans PDF allows you to customize your project to fit your specific needs, making it an excellent resource for home organization.
Overview of Shoe Rack Plans
Shoe rack plans provide detailed guides for creating functional shoe storage solutions. They include step-by-step instructions, material lists, and diagrams for various designs, from simple to complex. These plans cater to different skill levels, offering customizable options to suit individual needs. Whether for small spaces or large collections, shoe rack plans ensure efficient organization and stylish storage. They are ideal for DIY enthusiasts seeking practical and cost-effective projects.
Why Use a Shoe Rack Plan PDF?
A Shoe Rack Plan PDF offers a convenient, cost-effective solution for organizing shoes. It provides detailed instructions, diagrams, and material lists, ensuring a smooth DIY experience. These plans are customizable, allowing you to tailor the design to your space and style. They also help optimize storage, reduce clutter, and enhance durability. Perfect for all skill levels, a Shoe Rack Plan PDF is a practical tool for creating functional and stylish shoe storage.
Factors to Consider Before Building
Assess space constraints, tool availability, and material costs. Measure the area accurately and consider the number of shoes to ensure the rack fits perfectly and meets your needs.
Space and Measurement Requirements
Assess the available space where the shoe rack will be placed. Measure the length, width, and height of the area to ensure the rack fits perfectly. Consider the size and quantity of shoes to determine the number of shelves or compartments needed. Use a tape measure to record precise dimensions, ensuring the design aligns with the room’s layout. Proper measurements prevent wasted space and ensure functionality. Accuracy is key for a seamless fit.
Material Selection and Budgeting
Select durable materials like plywood, MDF, or solid wood for your shoe rack. Consider metal frames for added strength. Budgeting is crucial; set a budget and compare material costs. Use recycled or reclaimed wood for an eco-friendly option. Ensure materials align with the design and intended use. Proper planning helps avoid overspending and guarantees a sturdy, long-lasting shoe rack that meets your storage needs effectively.
Types of DIY Shoe Rack Plans
Explore various DIY shoe rack plans, including wall-mounted, standalone, and customizable designs. These plans, available as PDFs, offer space-efficient and stylish storage solutions for your shoes.
Wall-Mounted Shoe Rack Plans
Wall-mounted shoe rack plans are ideal for maximizing vertical space. These designs often feature adjustable shelves or compartments, making them perfect for small areas like entryways or closets. Many PDF guides offer step-by-step instructions, ensuring even beginners can install them securely. With options for modern or rustic styles, wall-mounted racks provide a sleek and practical shoe storage solution.
Standalone Shoe Rack Plans
Standalone shoe rack plans offer versatile and freestanding storage solutions. These designs are perfect for entryways, closets, or garages, providing ample space for multiple pairs of shoes. Many PDF guides include customizable options, allowing you to adjust sizes or add features like drawers or shelves. Durable materials and easy assembly make standalone racks a practical choice for organizing your shoe collection effectively.
Customizable Shoe Rack Designs
Customizable shoe rack designs allow you to tailor your storage solution to fit your unique needs. With adjustable shelves, modular components, and various styling options, these plans enable you to create a shoe rack that complements your home decor. Many PDF guides include tips for personalization, such as adding finishes, decorative trim, or compartments for accessories, ensuring your shoe rack is both functional and aesthetically pleasing.
Tools and Materials Needed
Building a shoe rack requires essential tools and materials for a successful project. Drills, saws, sanders, and measuring tools are necessary, while plywood, MDF, screws, and wood glue ensure durability and a polished finish.
Essential Tools for Building a Shoe Rack
Building a shoe rack requires a set of essential tools to ensure accuracy and efficiency. A drill, circular saw, or hand saw is necessary for cutting wood. Screwdrivers, hammers, and wrenches are needed for assembly. Measuring tools like tape measures and levels guarantee precise cuts and alignment. Sandpaper and clamps are also crucial for smoothing surfaces and holding pieces in place during assembly.
Recommended Materials for Durability
For a sturdy shoe rack, use durable materials like solid wood, plywood, or MDF. Metal frames or brackets can add strength. Choose high-quality screws, nails, and hinges for secure assembly. Consider water-resistant finishes for protection. Optional additions include casters for mobility or decorative trim for aesthetics. These materials ensure your shoe rack lasts and remains functional over time.

Step-by-Step Construction Guide
A Step-by-Step Construction Guide provides clear instructions for building a shoe rack. Start by preparing tools and workspace, then cut materials according to plans. Assemble components, ensuring alignment and stability. Finally, add finishes like paint or varnish for a polished look. This method ensures a smooth and successful project completion.
Preparing the Workspace and Tools
Begin by clearing a spacious work area and laying down protective covering. Gather essential tools like drills, screwdrivers, and saws. Ensure all materials from the PDF plan are measured and cut beforehand. Safety gear, such as gloves and goggles, is crucial. Organize tools and components for easy access, streamlining the assembly process. A well-prepared workspace ensures efficiency and safety throughout the project.
Assembling the Shoe Rack Components
Start by following the PDF guide to assemble the shoe rack components. Attach shelves and frames using screws and drills. Ensure proper alignment and stability by checking measurements. Use clamps to hold pieces in place while securing them. Organize hardware like bolts and screws in advance to avoid delays. Double-check each step to prevent errors and achieve a sturdy structure. Sand rough edges before final assembly for a polished finish.
Final Assembly and Finishing Touches
Once all components are assembled, proceed to the final assembly by attaching shelves and supports securely. Sand all surfaces to smooth out rough edges and splinters. Apply paint, stain, or varnish for a polished look. Allow the finish to dry completely before use. Install any hardware, such as knobs or handles, for functionality. Ensure all parts fit seamlessly and the structure is stable. Perform a final inspection to address any imperfections or gaps.

Customization and Design Tips
Personalize your shoe rack with unique finishes, colors, or decorative hardware. Consider adding compartments or adjustable shelves for versatility. Incorporate styles that match your home decor seamlessly.
Adding Personalized Features
Enhance your shoe rack with personalized touches like engraved names, custom colors, or unique designs. Add compartments for accessories or adjustable shelves for versatility. Incorporate materials like metal or reclaimed wood for a rustic look. Personalized features ensure your shoe rack reflects your style while maintaining functionality. These custom elements make your project truly one-of-a-kind and tailored to your needs.
Painting and Decorating Ideas
Elevate your shoe rack’s appearance with creative painting and decorating ideas. Use vibrant colors, stripes, or ombre effects for a modern look, or opt for a rustic finish with distressed techniques. Add decals, stickers, or stencils for personal flair. Consider a monochromatic scheme for a sleek look or natural wood tones for a classic feel. Apply a protective varnish to ensure durability and make your shoe rack stand out with these stylish touches.
Benefits of Building Your Own Shoe Rack
Building your own shoe rack allows for customization, saving money, and creating a tailored storage solution that fits your space and style perfectly, while enjoying the satisfaction of a DIY project.
Cost Efficiency and Space Optimization
Building your own shoe rack offers significant cost savings compared to buying pre-made options. DIY plans often use affordable materials like plywood or reclaimed wood, reducing expenses. Custom designs ensure optimal use of available space, such as entryways, closets, or under-stair areas. This approach minimizes waste and maximizes functionality, making it a budget-friendly and eco-conscious solution. Step-by-step guides help achieve professional results without the professional price tag.
Environmental Impact and Sustainability
Building your own shoe rack promotes sustainability by allowing the use of reclaimed or eco-friendly materials, such as recycled wood or low-VOC paints. DIY projects reduce waste by ensuring materials are used efficiently. Additionally, creating a durable shoe rack minimizes the need for frequent replacements, lowering your carbon footprint. This approach supports environmentally responsible practices while organizing your space effectively.
Troubleshooting Common Issues
Addressing measurement errors and fixing assembly mistakes are key to ensuring your shoe rack is sturdy and functional. Double-check measurements and tighten any loose joints for stability.
Addressing Measurement Errors
Measurement errors can lead to misaligned shelves or unstable structures. Always double-check your measurements before cutting materials. Use a tape measure and square to ensure accuracy. If errors occur, adjust the plan or start over to avoid compromised results. Proper alignment is crucial for both functionality and aesthetics, so take your time during the measuring process.
Fixing Assembly Mistakes
If assembly mistakes occur, identify the error early to avoid further complications; Disassemble the affected parts carefully and realign components according to the plan. Use wood glue or clamps to secure joints properly. Double-check instructions and measurements to prevent recurrence. Sand any uneven surfaces before reassembling. Addressing mistakes promptly ensures a sturdy and functional shoe rack, saving time and materials in the long run.
Building a shoe rack from a PDF plan is a cost-effective, eco-friendly project that optimizes space and enhances home organization, offering a sense of accomplishment and sustainability.
Long-Term Maintenance Tips
Regularly clean the shoe rack to prevent dust buildup and maintain its appearance. Inspect for damage and tighten loose screws promptly. Apply a protective finish to shield against moisture and wear. Rotate shoes seasonally to ensure even usage and prevent overcrowding. Store out-of-season shoes in protective covers to keep them dust-free. These simple steps ensure your shoe rack remains durable and functional for years.
Encouragement to Start Your Project
Don’t hesitate to begin your DIY shoe rack project! With clear instructions and customizable plans, you can create a functional and stylish storage solution. Even if you’re a beginner, the step-by-step guides make it easy to achieve professional-looking results. Take pride in crafting something useful for your home while saving money and reducing clutter. Start organizing your shoes today and enjoy the satisfaction of a job well done!

Additional Resources
Explore websites like Instructables, Ana White, and The Spruce Crafts for free shoe rack plan PDFs. These sites offer diverse designs, tutorials, and inspiration for your project.
- Instructables
- Ana White
- The Spruce Crafts
Recommended Websites for Shoe Rack Plans
Discover top websites offering free shoe rack plans PDFs, such as Instructables, Ana White, and The Spruce Crafts. These platforms provide detailed tutorials, diagrams, and material lists to help you create functional and stylish shoe storage solutions. Visit these sites to explore a variety of designs tailored for different spaces and skill levels. Start your DIY project with confidence using their expert guides and inspiration.
Where to Find Free Shoe Rack Plan PDFs
Download free shoe rack plan PDFs from websites like Instructables, Ana White, and The Spruce Crafts. These platforms offer a wide range of DIY designs, from simple to complex, with step-by-step instructions and diagrams. You can also explore Pinterest and YouTube for additional free resources. These sites cater to all skill levels, ensuring you find the perfect plan to suit your needs and preferences for building a functional shoe rack.